Its coming up to Halloween and I personally love this event and generally the lead up to it.
Since I was a small lad and was living at home with my family, I remember the excitement build at school as our lessons in art and design etc moved towards a more Halloween focus.
I remember being dragged round the shops with my mum throughout the year and the feeling I got when the displays took on a new look to sell the sweets and the other ghoulish delights.
So this has carried on and when I became a Dad, I got to start getting all those exciting feelings again but now its so much better!
I get to come up with some random things and the house gets a make over.
We joke in our house that its bad luck to clear the spider webs in October. Makes the place look the part come the end of the month as we seem to house quite a few of the little tykes!.
So what’s this all got to do with Arduino and Pumpkins I hear you asking yourself? Well, I have many hobbies and this project has been combining quite a few of them.
So lets cover those hobbies off quickly:
3D Printing
3D Design
Linux
Arduino electronics
Bargain shopping
Solution development
So simply, you can see that these hobbies either can overlap very easily or remain separate.
Lets get to it.
The plan is to make a set of Pumpkins that are 3D printed and then wired up to an arduino to make certain LEDs (Light Emitting Diode(s)) to do my bidding.
Broken down into steps, they seem simple but I will detail out each step for your enjoyment.
Step 1. Find suitable pumpkin print from www.thingiverse.com
Step 2. Print 3D pumkpins
Step 3. Source low cost LEDs (Basically Shopping)
Step 4. Source Arduino and needed wires
Step 5. Connect electronics up
Step 6. Program Arduino
Step 7. Make presentable
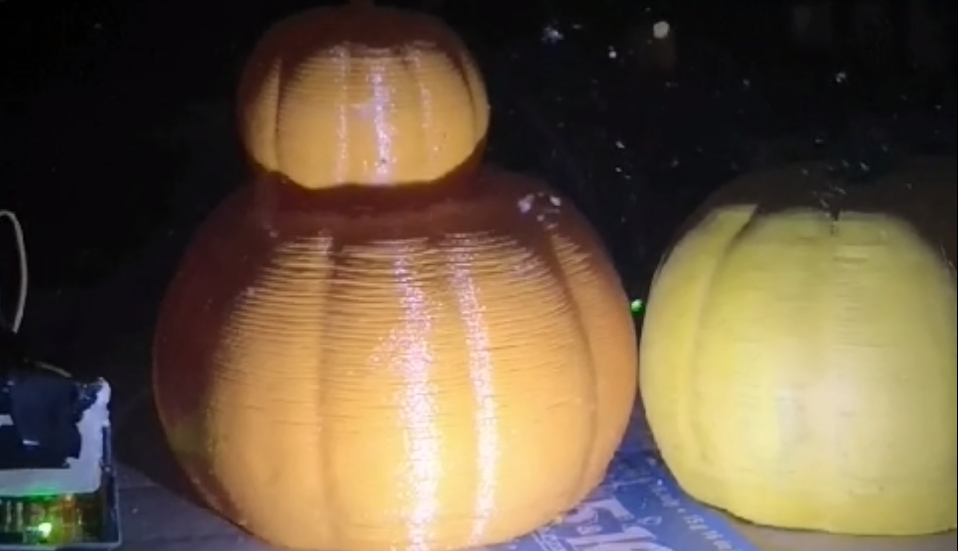
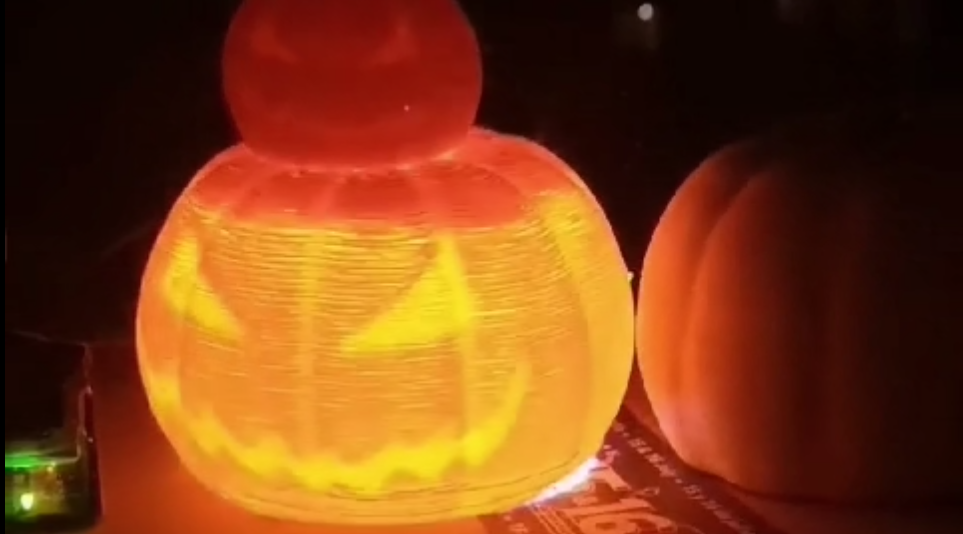
Step 1 was easy enough and was actually the originating “light bulb” moment. You can take a look here. Basically, the pumpkin is hollow and has a face on the inside of the print. This means that when lit from the outside it is smooth but then when you light the inside, the face is visible.
This made me think to automate this light on, light off.
Step 2 was not so simple. My 3D printer (lovingly called “oh bum”) decided to play all sorts of tricks which took some time to navigate.
I ended up using quite a lot of orange filament but the results will be fine.
If you are going to follow these steps and reproduce your own, I would recommend looking closely at the skin thickness you print with and the infill settings as this print was such a large overhang.
That said though, there is a reason my printer is called that and inlays another story completely.
Step 3 was super simple. I was performing my regular wander around the local shops and happened upon a reel of LEDs connected to a USB connector. For a £5. These had 30 LEDs on the strip, self adhesive backing paper and obviously run on USB power (5v).
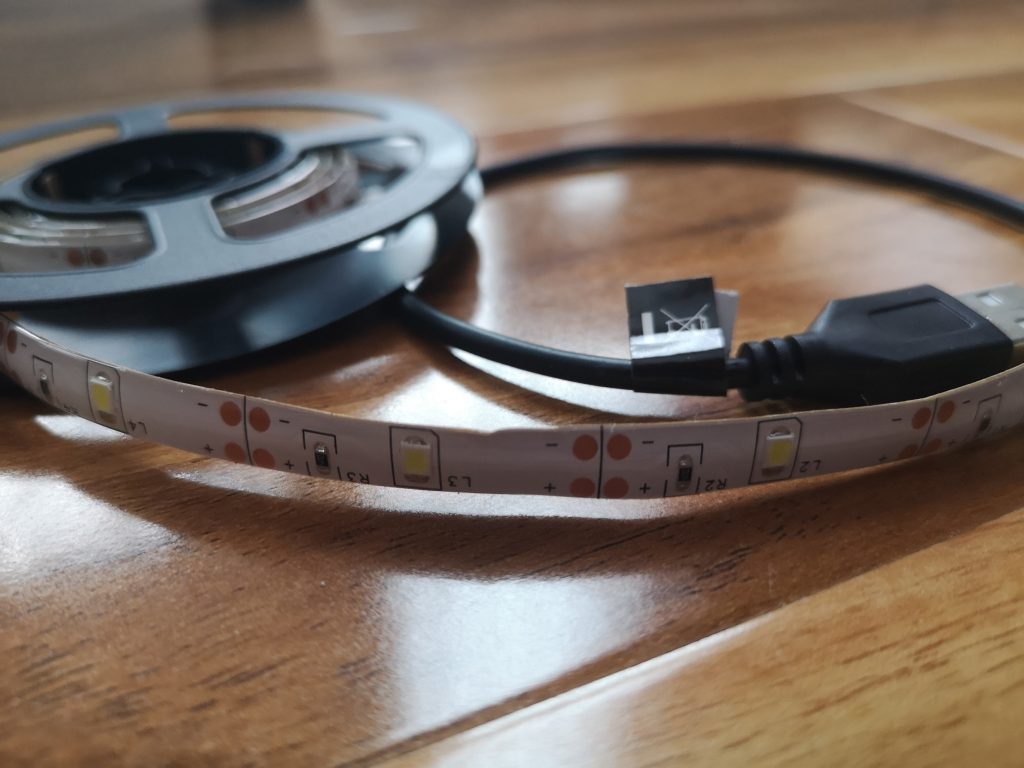
Interestingly though the LED strip has built in resistors that mean that each LED can be cut off the strip and with some new wiring, can be connected and powered by any 5v source. I expect they would run on less voltage too.
Step 4 was case of going online and finding an Arduino and some jumper wires. This was really easy and Amazon sorted it out within a day or so.
Step 5 wasn’t as hard as it was fiddly. The LEDs themselves are only fixed to a thin strip of sticky tape. The tape is copper and sliced to allow the positive and negative sides to remain separate but span the length of the tape. So power goes in one end of the tape and powers all the subsequent LEDs from there.
So removing one LED (cutting it off the end of the tape) leaves me with little to solder new wires onto. Further more, the LEDs then are not held particularly well and the wires threaten disconnecting etc.
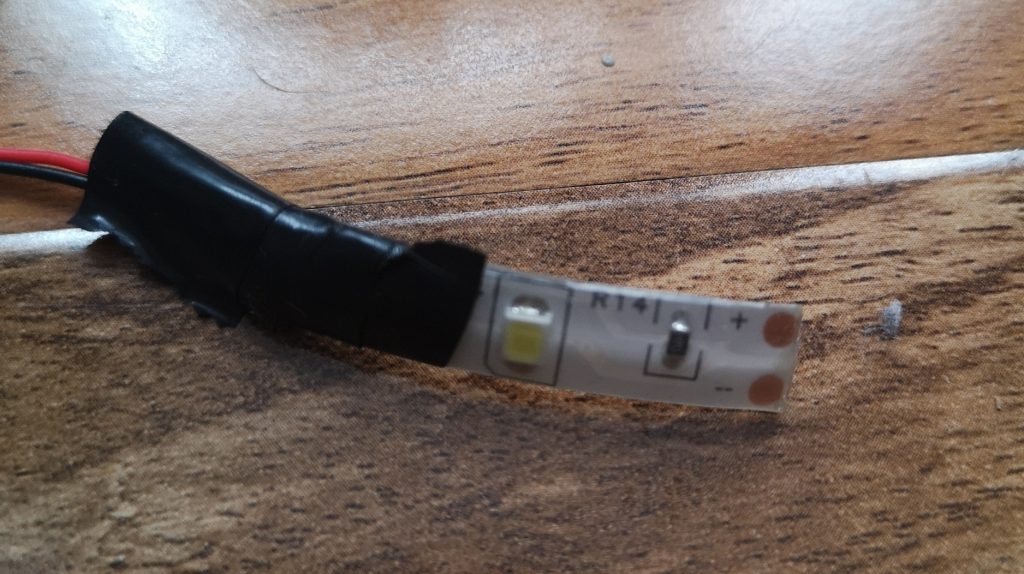
To solve this, I used some insulation tape to hold things tightly and this will allow me to position the completed, soldered and covered LEDs into where I need them.
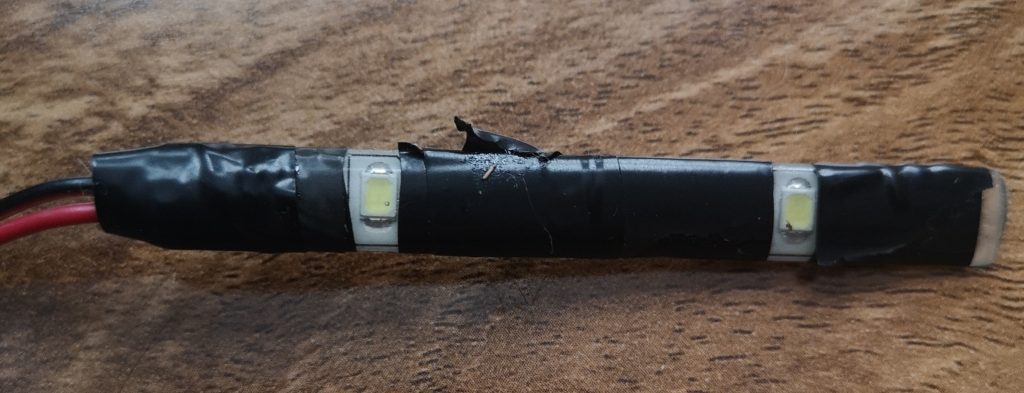
Some notes on wires, these should be a good length and thought needs to be put into where the display will be seen.
Once the wires to the LEDs were sorted, it was time to begin the thinking on how to connect them to the Arduino. This was simply a case of understanding that the Arduino puts out a voltage to the pins you program it to. So plugging the LEDs in was as simple as connecting the negative wires to the ground on the arduino and the positive wires to the arduino I/O pins.
Step 6 In conjunction with www.arduino.cc and various examples, it was easy to find an example code that was turning an LED on and off already made for me. This was in the Arduino software from install and following their instructions (something I have done many times before) I was able to code up a program to power one LED for 10 seconds and then switch off and then turn a couple of other LEDs on for a few seconds, then off, then on for a few seconds before repeating.
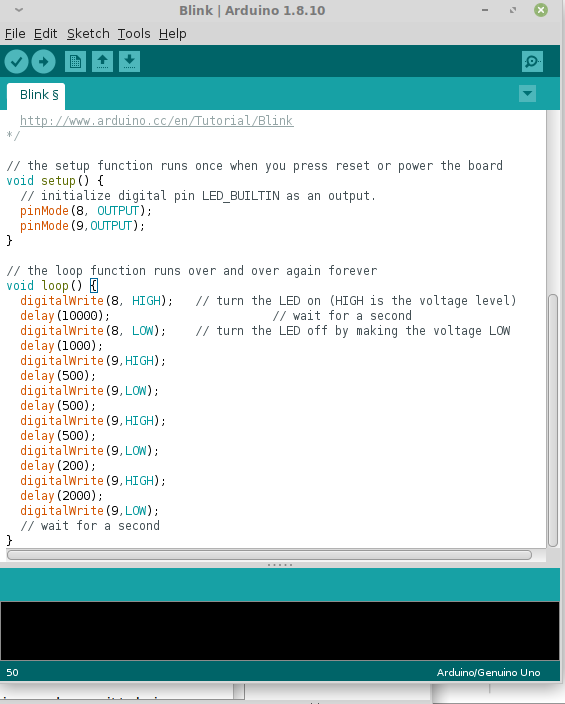
This was easier than it sounds and playing around with the timings was half the fun of this project.
Once the code was uploaded to the Arduino and, when powered up, the project did exactly as I programmed it to.
Making the first LED that comes on further away from my pumpkins (longer power wire), it means that the scene gets lit before it goes dark and the pumpkin faces display as the second LEDs power up.
Step 7 is a case of placing the completed project in your desired environment, powering up and watching the show as the project comes to life.
One thought on “Halloween Pumpkin Arduino Project”
Comments are closed.